The WordPress installation process
First of all, you must have a local server in your machine. Based on your operating system, there are different methods to install the local server. Usually users prefer to install the pre-build package and some users may configure the local server from the scratch.
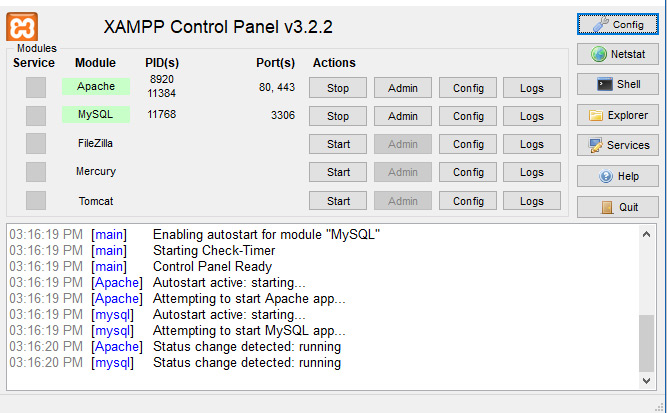
If you are using the Mac machine, you can install MAMP, AMPPS, or XAMPP while if you are the Windows user, you can use WAMP, AMPPS or XAMPP. If you are a Linux user, than I would suggest you to configure the Apache, MySQL/MariaDB directly via custom configuration. After installing the local server, you will get a dedicated folder where you can store your website files, such as in xampp that folder is htdocs while on WAMP and AMPPS that folder is www. Now just remember that whenever I use the word “localhost root” as file storage, I refer to that particular folder. In this article, I am using xampp configuration.
Note: Whenever you want to use the local server, just make sure this is in an active stage and Apache and MySQL is ON.
Configuration of a local server is a one-time process, so you can install all your local websites in this local server.
Now, I know you will say, come-on I KNOW THIS. Just let me know about WordPress.
So, let’s get started.
Download WordPress
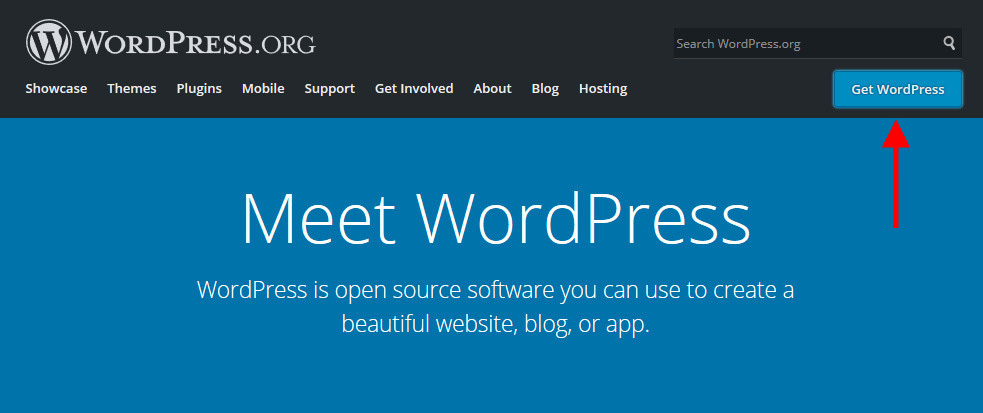
Open the WordPress.org website. Make sure it is “.org” and not “.com”. Once you open that website, you will see a big blue button – “Get WordPress”.
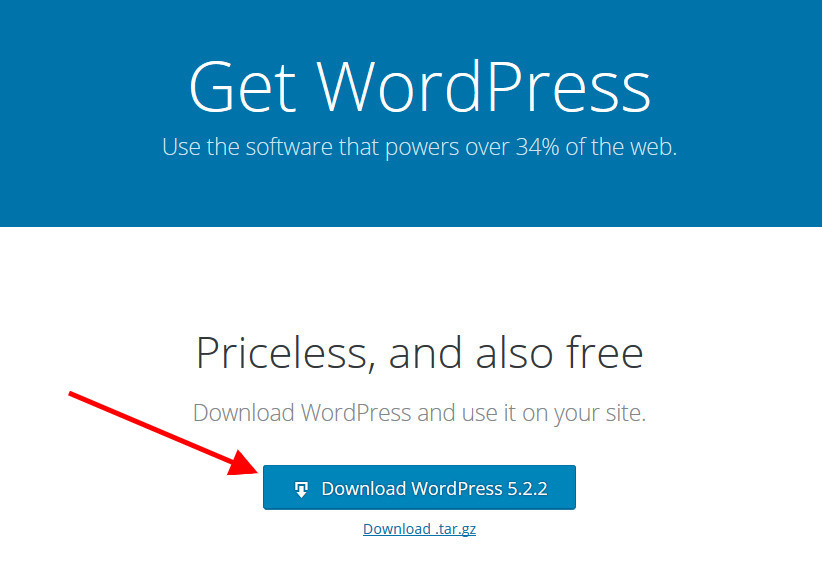
Just click on that and you will redirect to the WordPress download page. Click on the “Download WordPress” button. Here, you can also see the current version of the WordPress.
Now, you have a zip file that contains the WordPress files. You can extract this zip in the localhost root or any sub-folder of localhost root. Now when you extract the zip, the files will extract in a folder named “wordpress”. You can change the name of this folder as per your requirement. In this example, I am using the name “myfirstproject”.
When you open this folder, you will see the following file structure:

As of now, you don’t need to do anything using these files. So let it be as it is.
Open any browser. Yes “ANY”, you can event use IE 😉
Install WordPress
Based on my example, type the following URL: http://localhost/myfirstproject/ and you will see the following page:
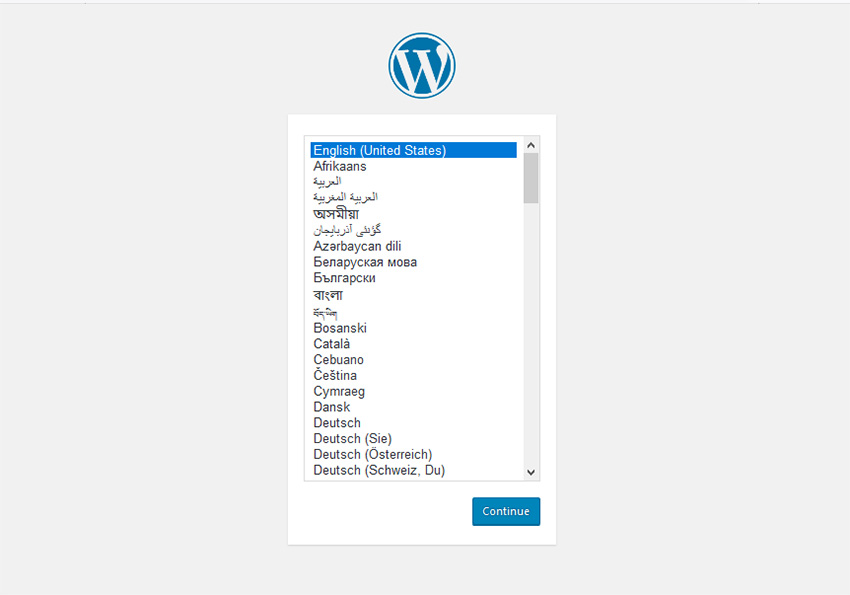
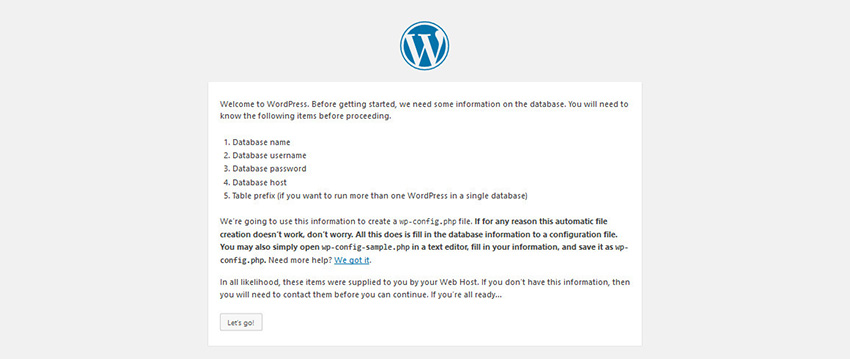
Here, I have selected my language “English (United States)” and click on the “Continue” button at the bottom right corner. Now you see a page with some information related to the database. You can click on “Let’s go!” button. Now you will see a form like this:
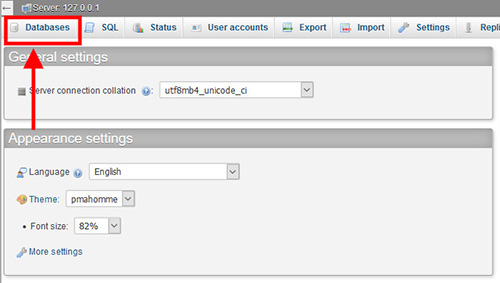
Before proceeding further, you need to create a database. So, let’s open the following URL to access the database: http://localhost/phpmyadmin/
How to create Database?
Here you will need to click on the “Database” button:
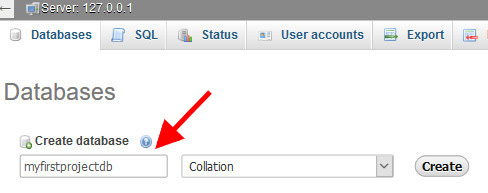
Now you have to create a database. You can use any name but in this example I am using the name – “myfirstprojectdb”. Use this name in “create database” field and click on Create button. Now your blank database is created. You can open this database and you will notice that this is blank.
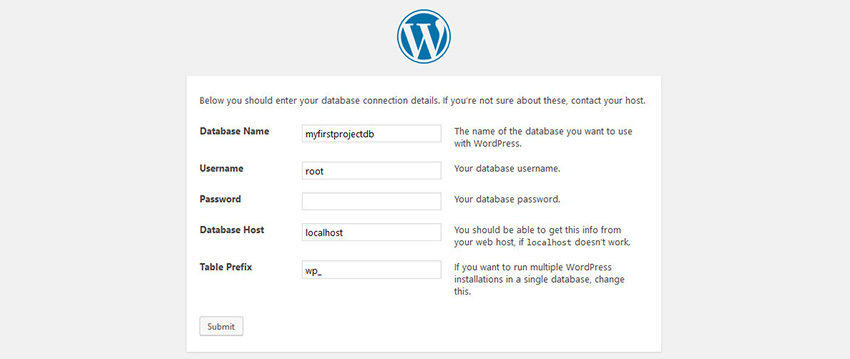
Now back to the WordPress installation screen, and put the database related information in the form and click on the submit button. You need to put the database name – “myfirstprojectdb”, database username (default is root), database password (by default this is blank for localhost, so no need to fill this), database host (default is localhost), and the table prefix (default is “wp_”):
Tip: in order to increase security, you can use the custom table prefix.
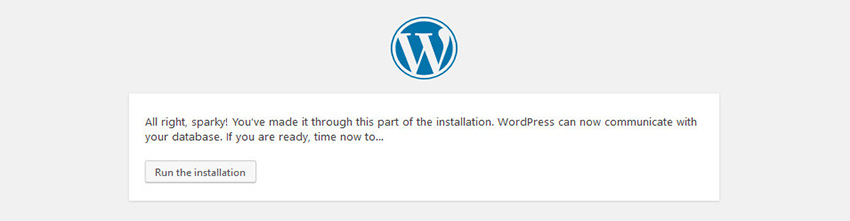
Once you submit the database information, now your WordPress is able to communicate with your database. If you found any error on this stage, please re-verify the database configuration and the username and password. In the next step, you will see small information and a button “Run the installation”, click on this button.
Now this is the last step, here you need to submit the information related to your main website, such as site title, username, password (These username and password is used to manage your website, and these are different than the database username and password), and the associated email id (this email id is used for the admin level notification and will not be publicly available). So, fill this form and click on the “Install WordPress” button.
Tip: In order to secure the website, do not use the common or easy to guess username/password. Always create a new username and complex/strong password. The complex password should contain the combination of uppercase, lowercase, numeric and special character and total length of the password should be at least 8 characters. WordPress provide you the hint of the strong password as well.
Bingo, your WordPress is installed now, and you can login to access your WordPress website.
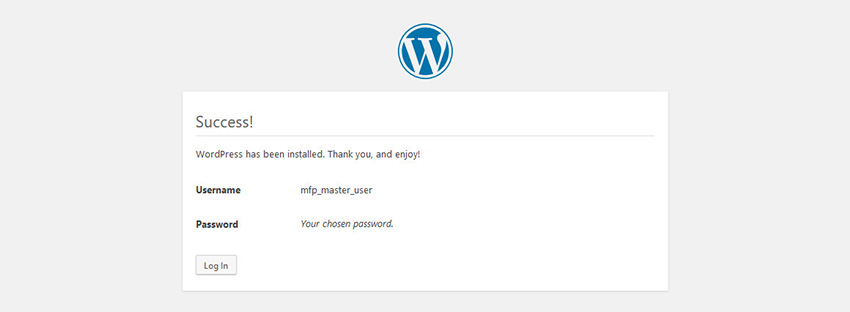
Note: By default you can access the admin dashboard by appending “/wp-admin/” in your main URL. Example, for this setup the admin URL is: http://localhost/myfirstproject/wp-admin/
Enjoy your WordPress and like this post and share on your social account.